Overview
This article describes how staff/faculty can connect their Nazareth office computers to the new Toshiba copiers deployed in November 2024. There are separate instructions for PC and Macintosh users. Your computer will need to be on campus when connecting to the new copiers.
Please be sure that all staff, faculty and student workers in your area have and follow these instructions. NOTE: If more that one person uses a particular computer (i.e student workers) each user will need to complete the applicable connection steps below.
Due to the large number of print users, we kindly ask that you and others in your area follow these instructions carefully before calling IT support for assistance.
PC/Windows Users
Option 1: Run the "Connect Toshiba Copiers" Script
- Once the copier you need to connect to has been installed in your area, reboot your PC and log in.
- Employees should notice a script icon on your desktop called: Connect Toshiba Copiers
- Double click on it.
- A command window will pop up as the script runs. You can then hit any key to close the window.
- The new copier should be connected to your PC.
Option 2: Manually connect to new copier
In the event you do not have access to the script (i.e student workers) or if the script fails for some reason, you can manually connect using the steps below:
- First, look up the queue name of the Toshiba copier in your area. Click here to view list of Toshiba copiers with their respective queue name and location information.
- Note the queue name you need to connect to
- Press the Windows key +R key
- In the Run dialog box, type this command: \\naz-ps-01\queue name (The queue name is obtained from the list in step 1)
- Click OK.
Example:

Wait a few seconds for the device to be installed. The Toshiba copier should now be ready for printing.
If the Toshiba device requires a department code, you will be prompted for it when you submit a print job. Any codes used previously should work for the new Toshiba device.
Macintosh Users
Connecting to the new Toshiba copier
- First, look up the queue name of the Toshiba copier in your area. Click here to view list of Toshiba copiers with their respective queue name and location information.
- On the menu bar click Go -->> then Applications -->> Self Service
- Locate the Connect Toshiba Copiers script and click connect
- Follow the steps on the screen
Setting Up Department/Copy Codes
If you need to use a department/copy code with your Toshiba device, you will need to set that code under Printer options for that copier:
1) Launch Microsoft Word
2) Select File -> Print
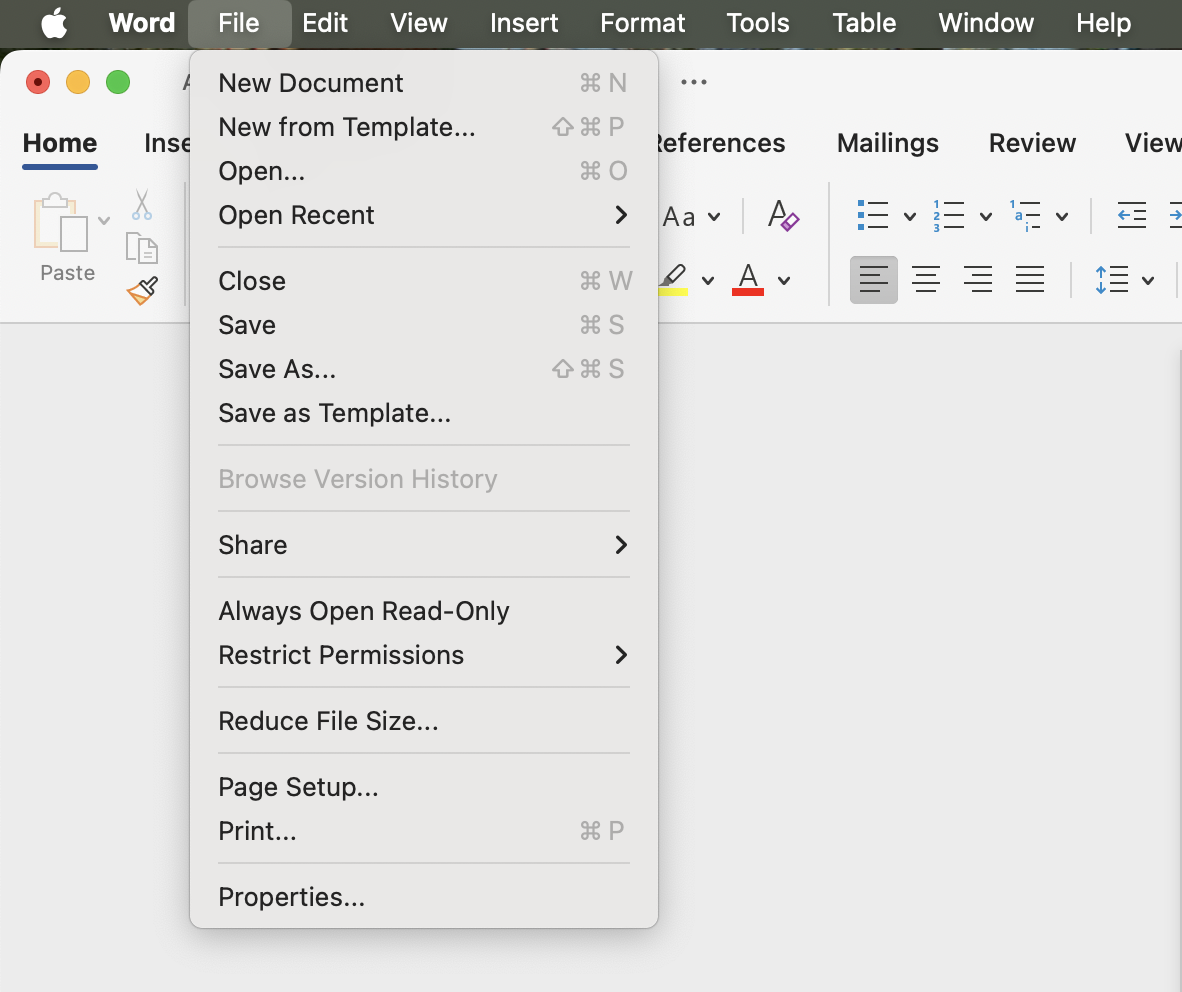
3) Under Printer Options, select Print Mode

4) Enter 5 digit copy code and click OK
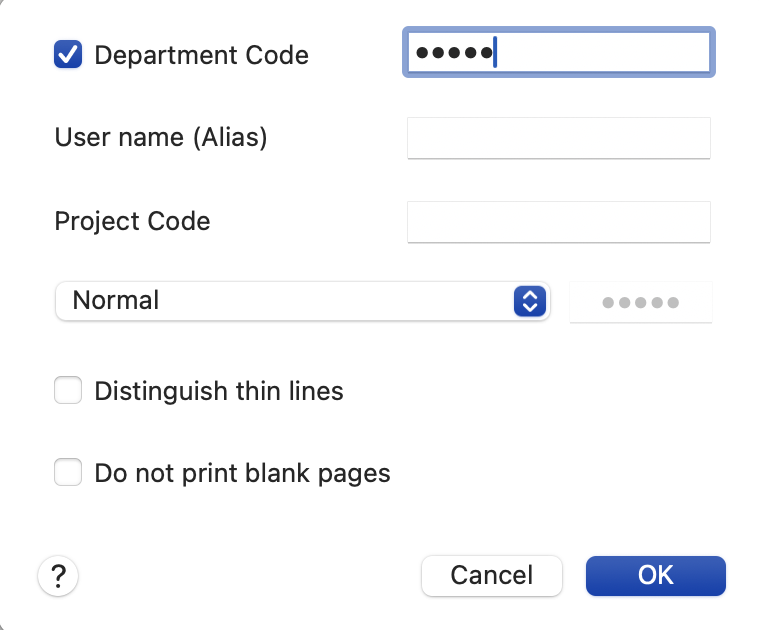
You will need to save a department/copy code(s) within a printer preset. At least one printer preset is used with black & white copiers. At least two printer presets are used with color copiers.
Skip to step #7 if this is a black & white Toshiba copier. Continue as follows if this is a color Toshiba copier.
5) Under Printer Options, select Color Settings 1

6) Select Mono as Color Type and click OK
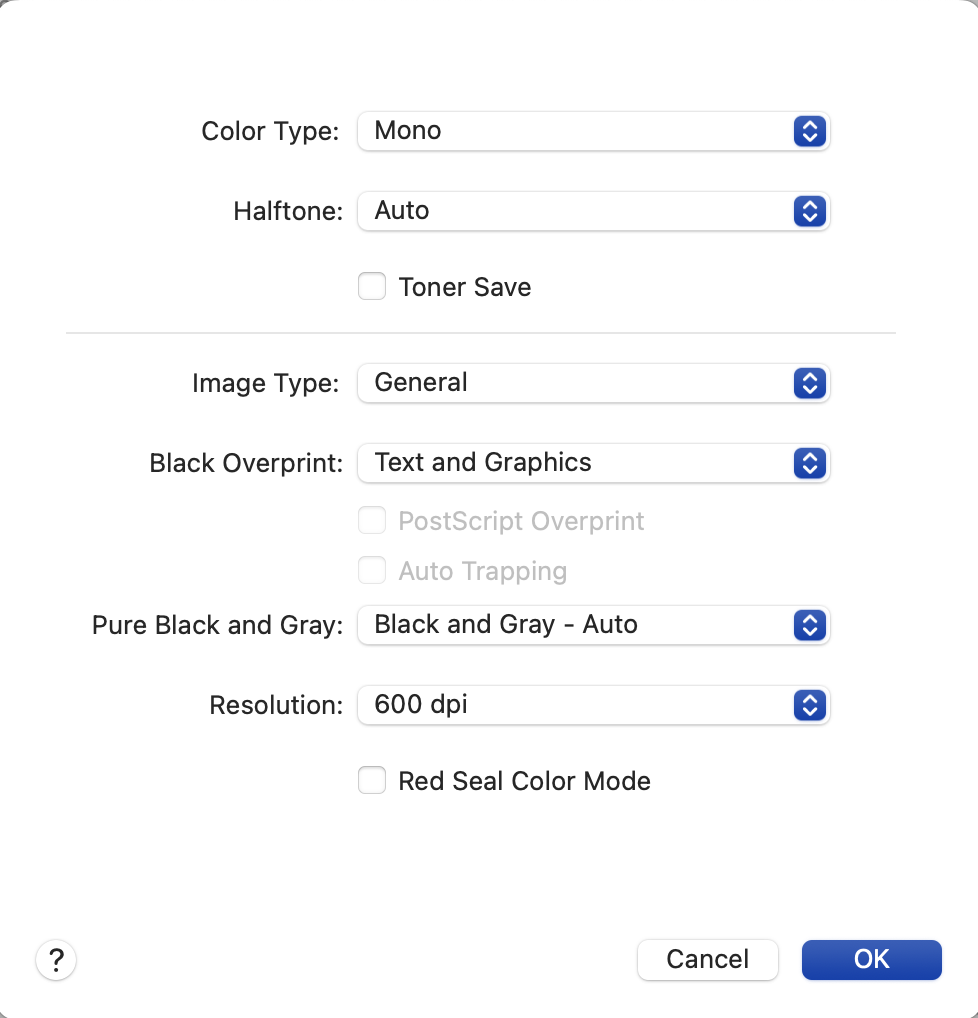
7) Under Presets, select Save Current Settings as Preset
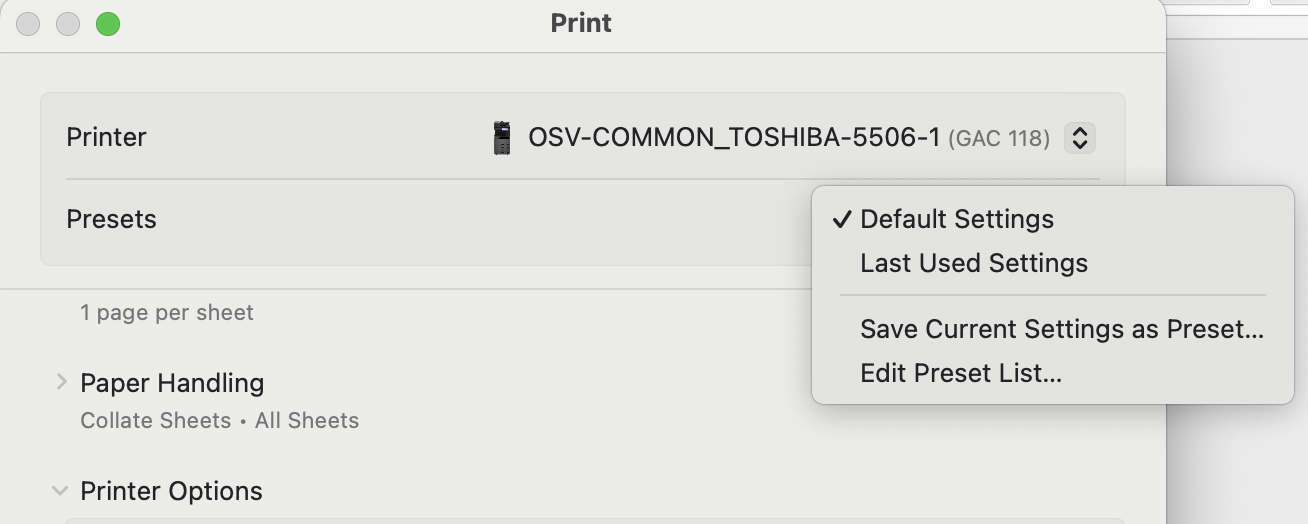
8) Enter B&W as the Preset Name and select OK
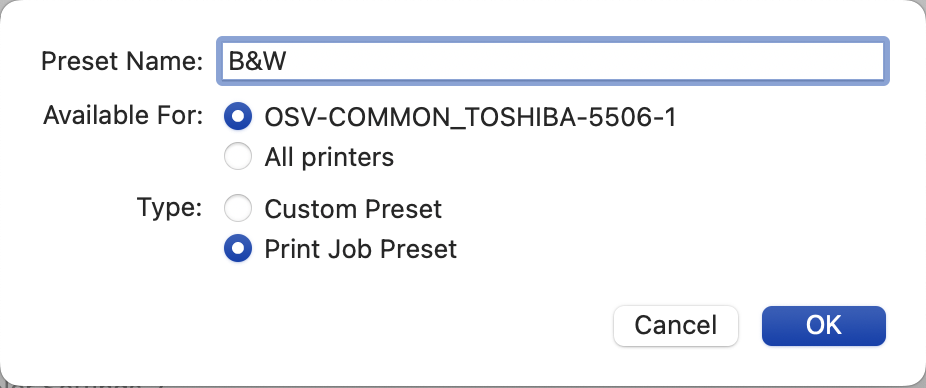
Skip to step #15 if this is a black & white Toshiba copier. Continue as follows if this is a color Toshiba copier.
9) Under Printer Options, select Print Mode

10) Enter 5 digit copy code and click OK

11) Under Printer Options, select Color Settings 1

12) Enter Auto as the Preset Name and select OK
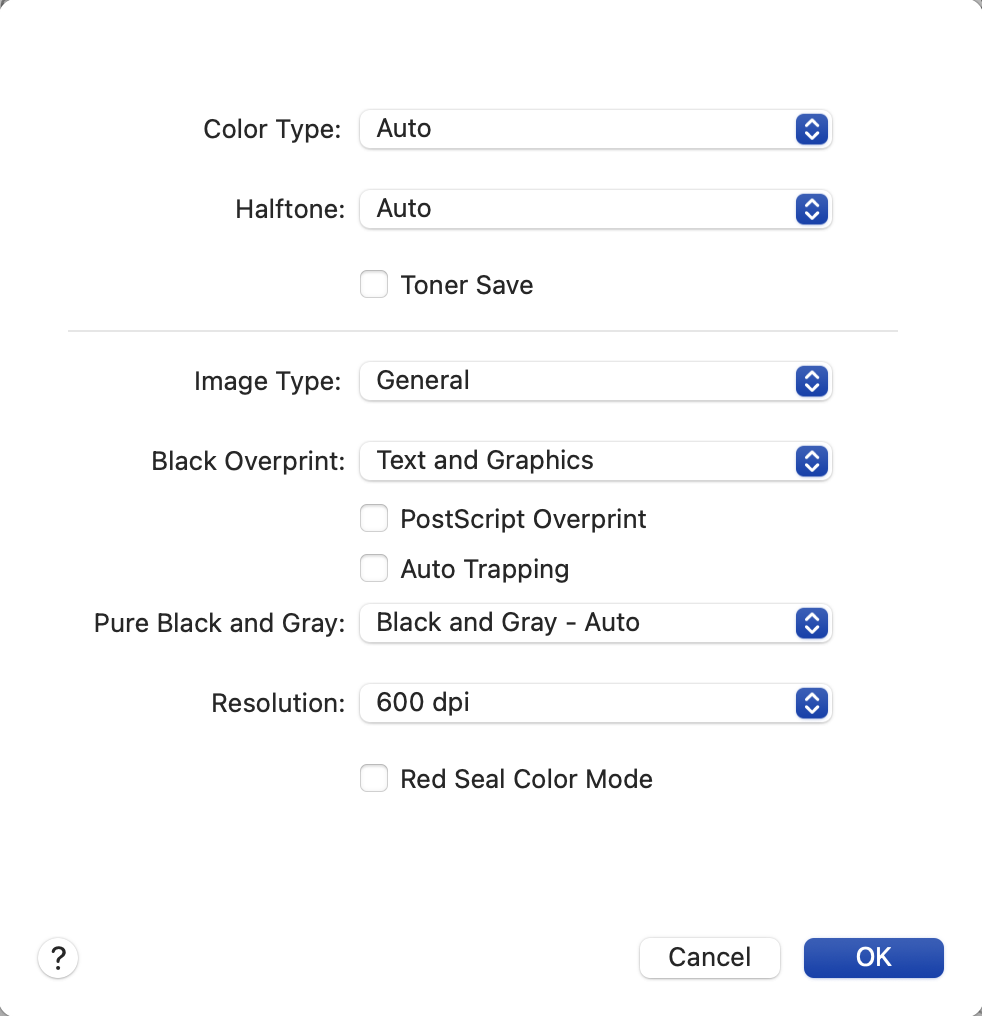
13) Under Presets, select Save Current Settings as Preset

14) Enter Color as the Preset Name and select OK
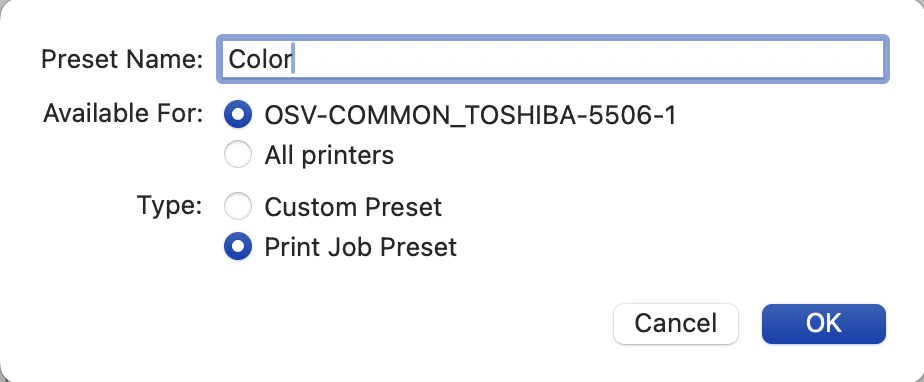
Copier Setting Configuration (Optional)
If you are interested in using all of the advanced features of your Toshiba device, then copier settings will need to be configured:
15) Open Printers & Scanners within System Settings

16) Select the Toshiba copier and click Options & Supplies
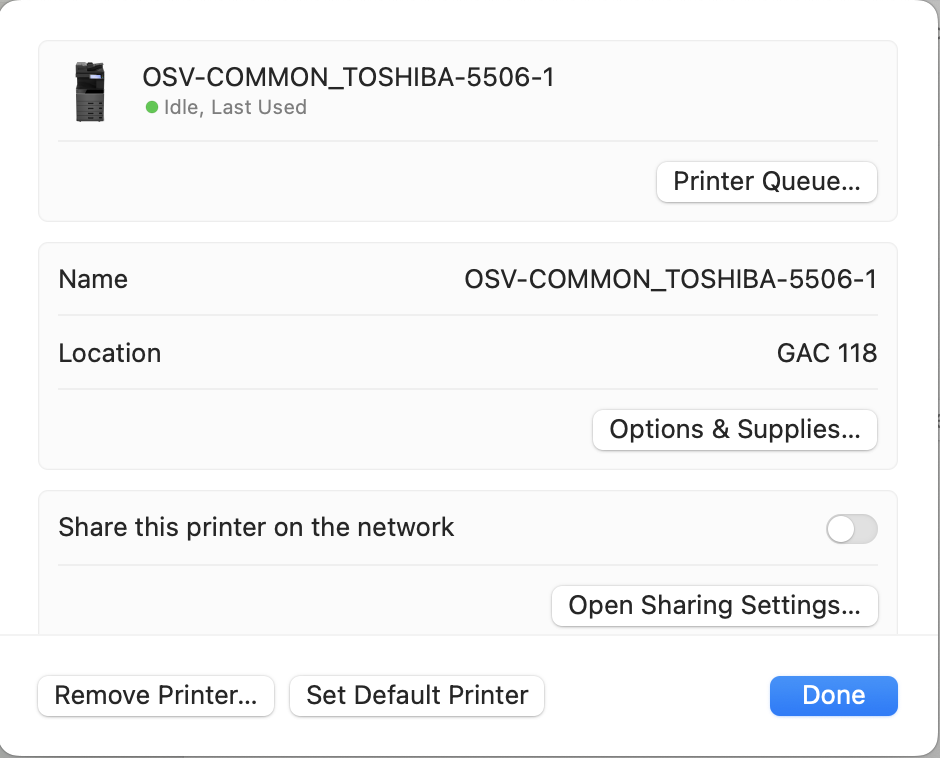
17) Choose the supported options for the Toshiba copier and then click OK
